You can calculate mileages based on cross-table calculations of multiple event layers to produce a mileage report. As shown in the sample report below that demonstrates the lane miles by urban type, the mileages are calculated by using two separate event layers: Urban Type and Number Travel Lanes.
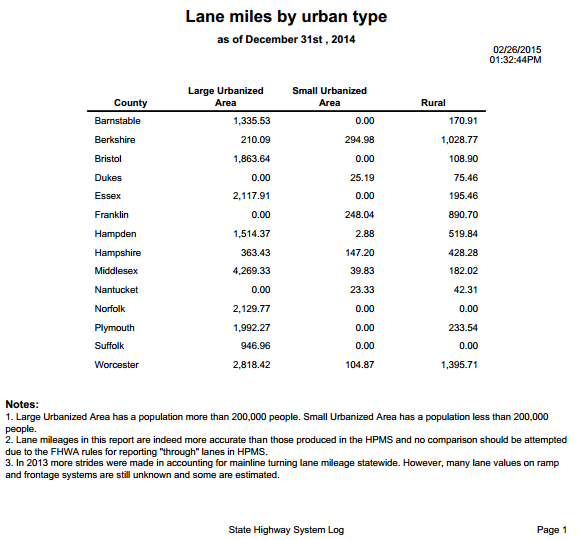
In this example, a mileage report similar to the one shown above that uses cross table calculations of multiple event layers is produced. The mileages and summaries are calculated using internal event layers that are part of the LRS.
Data required
The following data layers are used to create the report. The layer names used here are for information only. You can use your own layer names to produce your reports:
Data layers used to create the mileage report
| LRS data type | Layer name | Explanation |
|---|---|---|
LRS Network layer | MilePoint | The routes are selected from this layer. The mileage is calculated on the selected routes. |
Internal linear event layer | County | This is the summary layer used to calculate countywise mileage of the routes. |
Internal linear event layer | Urban Type | The mileages are calculated using this layer. |
Internal linear event layer | Number Travel Lanes | The lane miles information is provided by this layer. |
- Configure a mileage report.
- Select the routes.
- Select the summary fields.
In this example, the County event is used as the summary event.
- Click Next.
- Click Add Field(s).
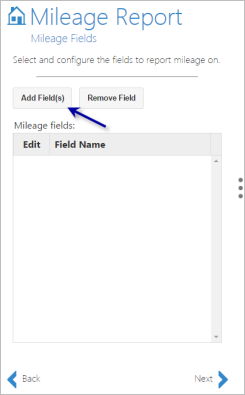
The Mileage Fields - Add Field(s) pane appears to the right.
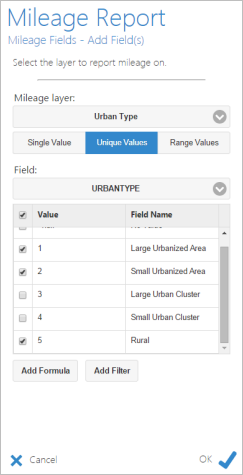
Adding the unique values using the Urban Type layer - Choose an event From the Mileage Layer drop-down list.
The internal linear events appear in this list. In this example, Urban Type is chosen.
- Click Unique Values.
- From the Field drop-down list, choose a unique value for the event.
- This drop-down list shows the fields available in the Urban Type event. In this example, the URBANTYPE field is chosen.
- The Add Formula and Add Field tools are applied to all the checked fields.
- To add an extra mileage field that is not part of the unique values, for example, by using the Speed_Limit field from the Speed Limit event, click OK and then follow the steps as described in the Add mileage fields section of Configuring a mileage report.
- Check the check boxes in the Field Name list to filter the unwanted fields from the report.
For this report, the Large Urban Cluster and Small Urban Cluster fields have been removed.
- Click Add Formula.
In this example, the lane miles for each urban type are calculated using a formula.
The Mileage Fields - Formula pane opens.
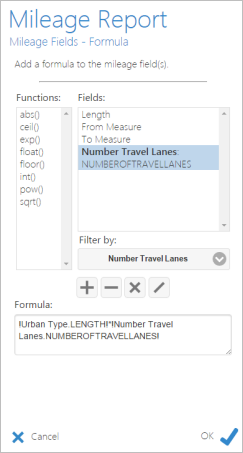
Using a formula for cross-tabulation of events - In the Formula text box, add a formula similar to !UrbanType.LENGTH!*!NumberTravelLanes.NUMBEROFTRAVELLANES!.
Tip:
To add the formula using the UI, click Length in the Fields list, click the multiplication button, choose the Number Travel Lanes event in the Filter by drop-down list, and click NUMBEROFTRAVELLANES from the Fields list.
Use the following to calculate lane mileage in this formula:
- !Lane Mileage! = (!Length!*(!NUMBEROFTRAVELLANES!)) ), where !LENGTH! = (!to_measure!-!from_measure!)
- For each element in the formula, the event's name precedes the field name. Therefore, the element !UrbanType.LENGTH! means that the length field comes from the Urban Type event.
- The variable !NUMBEROFTRAVELLANES! comes from the values present in the attribute field of the selected mileage layer.
- Only numerical fields are listed in the Fields list.
This formula will be applied to calculate mileage for all the checked fields from the previous step.
- Click OK.
The added fields now act individually and you can edit them one by one using the edit tool.
The mileage fields with chosen urban types appear in the Field Name list.
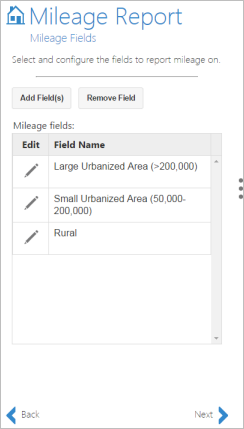
- Click Next.
The Report Fields pane appears.
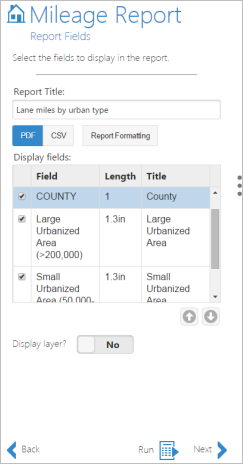
Use the report formatting tools as shown in Formatting a report and then run the report as shown in Running a report to produce a report using cross-table calculation of multiple event layers.