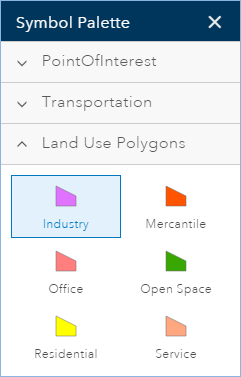
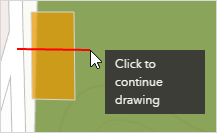
All project team members can sketch and draw in the active scenario using symbols from a palette and drawing tools.

Drawing tools
The following drawing tools are provided:

- Draw Point—Used to create points on mouse click.
- Draw Freehand Polyline—Create lines following mouse movement.
- Draw Polyline—Create lines following mouse clicks.
- Draw Freehand Polygon—Create polygons following mouse movement.
- Draw Auto-Completed Freehand Polygon—Create freehand polygons that adjoin each other. This tool creates polygons that append to the boundary of an existing polygon following mouse movement.
- Draw Polygon—Create polygons following mouse clicks.
- Draw Auto-Completed Polygon—Create polygons that adjoin each other. This tool creates a polygon that appends to the boundary of an existing polygon following mouse clicks.
- Draw Circle—Create round features.
- Draw Ellipse—Create ellipse features. Available in a dropdown menu beneath Draw Circle.
- Draw Rectangle—Create rectangle features. Available in a dropdown menu beneath Draw Circle.
- Split—Divide a polygon or polyline by sketching a dividing line through it.
Draw a point
You can use the Draw Point tool to create a point feature from one of the point templates in the symbol palette.
- On the application toolbar, click Design.
- Click the Drawing Tools icon to display the drawing tools toolbar.
- Click the point symbol on the toolbar and then choose a symbol in the symbol palette.
- Click the map to add the point.
Create a line
You can create lines using Draw Freehand Polyline or Draw Polyline, and one of the line templates from the symbol palette.
- On the application toolbar, click Design.
- Click the Drawing Tools icon to display the drawing tools toolbar.
- Click the Draw Freehand Polyline (or Draw Polyline) tool.
- Click on one of the line symbols on the symbol palette.
- Click the map and hold the mouse button to draw the freehand line, and release the mouse to complete (or click the map to create a vertex for the polyline and double-click to complete).
Create a polygon
You can create polygons using one of the polygon templates from the symbol palette and using one of the polygon drawing tools.
- On the application toolbar, click Design.
- Click the Drawing Tools icon to display the drawing tools toolbar.
- Click one of the polygon drawing tools.
- Select one of the polygon symbols on the symbol palette.
- Click the map to draw the polygon.
Split a polygon or a line
Use the split tool to divide a polygon or polyline. This tool is useful for creating subdivisions from larger parcels.
- On the application toolbar, click Design.
- Click the Drawing Tools icon to display the drawing tools toolbar.
- Click the Split Polygon icon. Optionally, click the dropdown next to the tool and choose a design layer.
- Sketch a line through the polygon (or polyline) that you want to split. Double–click to stop sketching and execute the split.

Snapping
Snapping allows you to create features that connect to each other so your edits are more accurate. Once you enable snapping in GeoPlanner, you can snap vertices in your new features to any other feature layer in your map. You can also use snapping within the Measure tool. If you enable snapping, you will see snapping feedback when you measure distances, areas and locations.
Note:
The following edit tools do not support snapping:
- Draw freehand polyline
- Draw freehand polygon
- Draw auto–complete freehand polygon
To use snapping with these tools, sketch your features first and then double click your shape to show its vertices. You can then snap individual vertices of the shape to other vertices, points or edges.
You cannot snap to feature layers hosted within map services.
Enable snapping
To enable snapping move the Snapping slider to green in the Design segment's Drawing tools toolbar. 
You can also enable snapping while you are sketching by pressing the Ctrl key. This allows you to enable snapping temporarily while sketching a feature.
Disable snapping
To disable snapping move the Snapping slider to red in the Design segment's Drawing tools toolbar.
You can also disable snapping while you are sketching by pressing the Ctrl key. This allows you to disable snapping temporarily while sketching a feature.
Paint a feature type
Use the Paint tool to propose an alternative type to an existing feature. The Paint tool updates an existing feature's type to the selected symbol in the symbol palette and changes any default attribute values. Attribute values are never updated to null.
- On the application toolbar, click Design.
- Click the Paint icon to display the painting tools toolbar.

- Click a symbol in the Symbol Palette.
- Click on an existing feature in your active scenario.
Update many features using the Paint tool
You can update many scenario features at once using the Paint tool. This tool allows you to either click and drag a rectangle around or lasso one or more scenario features. Any feature that intersects the shape you draw will be updated to the type you select in the symbol palette. The tool will also update any attributes to default values. Attribute values are never updated to null.
- On the application toolbar, click Design.
- Click the Paint icon to display the painting tools toolbar.

- Choose one of the following options:
- Paint by click or rectangle—Updates one or more features by clicking and dragging a rectangle around or through features you want to update.
- Paint by lasso—Updates one or more features by sketching a shape around or through features you want to update.
- Click a symbol in the Symbol Palette.
- Click and drag a rectangle around or lasso existing scenario features you want to update.